
The following describes how to install the PHP-eSeller shopping cart script for the first time. The process is simple and should take just a few minutes. After that you can set up your digital products and PHP shopping cart.

-
Installing PHP-eSeller Shopping Cart Script
-

-
Requirements
- PHP 7 and 8
- Apache web server or Windows IIS
- An SSL certificate on your web server to use https for communications with PayPal
- mySQL database version 5 or higher
- Linux, FreeBSD or Windows operating system on the web server
- A Paypal Business or Premier account (if using PayPal) sign up here.
- Email functionality on the web server so that the PHP scripts can send out emails to customers.
- Most web hosts now have PHP and mySQL as standard so you should not have any issue in finding a basic web hosting plan. We have found web hosts such as siteground.com and lunarpages.com to meet requirements. Email us if you require advice.
-
The files are supplied in .zip format. After unzipping the files you will have a folder called 'phpeseller' containing a number of files and folders.
Create a folder on your web server with a suitable name such as 'music', or 'products' and upload all the files and folders into the new folder. If you are uploading to a folder called 'music' then the site will be located at http://
www.yoursitename.com/ music/ Remember to to use lower case for your folder name, as Linux is case sensitive.
-
The digital files which you are going to sell and allow customers to download, should be placed in a location outside the root of your web site and on the same web server. This is so that no one can get to your files using a browser.
If you cannot place the files outside your web site root, then you can protect them using a .htaccess file. I have provided a number of test files in the /files folder along with a .htaccess file. The .htaccess file will deny all attempts to access the folder using a web browser.
-
If you are using mp3 clips to allow the customer to preview the mp3s, the mp3 clips cannot be placed in the same folder as the files you are going to sell because that folder is protected. Any mp3 clips are separate files that are usually about 20 seconds long and should be placed in a publicly accessible folder.
-
Create a mySQL database with cpanel tutorial (old style) Click here for a tutorial
Create a mySQL database with cpanel tutorial (new style) Click here for a tutorial
Create a mySQL database with GoDaddy hosting tutorial Click here for a tutorial
-
Create a new empty mySQL database with an appropriate name (e.g. eseller).
The above links provides some examples on how to create a database.
If you are using a hosting company, then you will probably be given a control panel to access your databases system. For mySQL this is usually phpMyAdmin which allows you to administer the database via a web browser.
Quite often hosting companies will prefix the name of the database with your login name. So when you create a database called eseller, it becomes paul_eseller for example.
You can install into an existing database if you wish. The table names are all prefixed by ipn_. First check that there are no other tables in your database that start with ipn_ to make sure that there are no name clashes.
-
Create a user (e.g. eselleruser) that has access to that database and that database only.
If you are using a hosting company, there will probably be an administration page which will allow you to create database users, define their permissions and add the user to your database using a set up wizard.
Quite often hosting companies will prefix the user name with your login name. So when you enter eselleruser, it becomes paul_eselleruser for example.
In the first instance, you need to make sure that the user has permissions which include CREATE privileges because the first script that you run will be creating tables in the database. Normally you will select the All Privileges option for this.
-
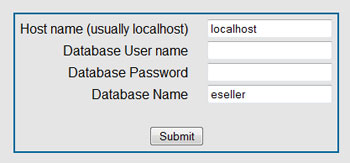
The install.php page should be accessible at :
http://
www.yoursitename.com/ eseller/ install.php When you display this in your web browser, it will ask for host name, database name, username and password.
The above image shows the default display.
The host name will usually be localhost, the database name will be whatever you have already created, usually eseller. Enter in a user name and password for a user who has table creation privileges.
Note that the host name may not be localhost, you will need to check your hosting for that. Also, the username and the database name may have a prefix added by your host, again you will need to check your hosting for that.
Click on 'Create' and the script will display a list, which should all be green to indicate success. Any failures will be indicated in red.
If all are green, then all tables have been created.
Note that this database script is also used to update older database versions of PHP-eSeller to the new database version.
-
The config.php file contains the database connection username / password for the application.
Edit the config.php file with a text editor such as Notepad. Do not put any spaces, blank lines or other text after the last ?> symbol or before the first <?php symbol.
You need to enter:
- database host name (usually localhost, but see your hosting documentation for this)
- database name
- database username
- database password
Note that the database name, and database username may have been given a prefix by the host system.
-
If you have not enabled IPN in your PayPal account, you do need to enable it so that your PayPal account sends back the IPN.
- Log into your PayPal account and click on the cog icon in the top right hand side of the menu.
- Click on 'Seller Tools' in the sub menu.
- Under 'Instant payment notifications', click on 'Update'.
- Enable the IPN.
In the url box, enter the confirm.php url which will be http://
www.yoursitename.com/ . This url is not actually needed because the PHP script sends the url to PayPal anyway.installation_folder/ ipn/ confirm.php If the url box is already being used by another application, you do not have to change it because the PHP script sends the url to PayPal anyway.
-
The application should now be working correctly and you can go to the admin pages using :
http://
www.yoursitename.com/ eseller/ admin/ The default login is user : admin@somewhere.com, password : password
You should change your password and user name as soon as possible via the 'change password' page.
-
Examples of how to display your products and how to place the login page onto a web page are explained on the following associated pages:
Buttons added by hand to your web pages
Add buttons by handStore front pages for shopping cart purchases
Add buttons for shopping cart
Contacts : Any questions?
Email :
Pricing : PHP-eSeller costs $55 U.S. Dollars.
Purchase PageDemo : View an on-line demo illustrating the admin pages. Demos are live and you may purchase test items for $0.01 in value.
Demo Page
Copyright © 2004-2026