• PHP Key Codes - Email Features

  • PHP-KeyCodes

    For most installations the default method of sending emails will work perfectly well and no set up is required by you. In some situations you may want to send emails using smtp and this can be configured in the Admin settings under "SMTP set up".

    To use smtp, you will require an SMTP server which may require additional costs although you may be able to use a free account.

    This application uses PHPmailer class for smtp and you may have to refer to their documentation for the particular set up required for your smtp system.

    You will require the smtp hostname, and its username / password.

    Note also that you may have to set the smtp port. By default it is set to port 25 but it may need changing depending on your mail details.

    Also, it is possible that your host may have disabled the required port, so you may have to ask your host to allow port through their firewall.

    A suitable smtp relay service is authsmtp.com which requires port 2525.

  • PHP-KeyCodes

    HTML Email

    You can send emails as text or html format. This can be set when you create the product by selecting either 'Text' or 'HTML'.

    The following is a simple HTML text layout with some formatting and fonts when sending the keycodes email.

    <h3 style="font-family:sans-serif">Your Key Code Purchase</h3>

    <p style="font-family:sans-serif">To: [first_name] [last_name]<p>

    <p style="font-family:sans-serif">Your key codes are listed below:<p>

    <p style="font-family:sans-serif">[key_codes]</p>

    <p style="font-weight: bold; font-family:sans-serif; margin-left: 10px; margin-right: 10px;">Your Details</p>

    <p style="margin-left: 10px; margin-right: 10px; font-family:sans-serif">
    [email_address]<br/>
    [currency_code] [total_cost]<br/>
    [payer_business_name]<br/><br/>
    [address_name]<br/>
    [address_street]<br/>
    [address_city]<br/>
    [address_state]<br/>
    [address_zip]<br/>
    [address_country]</p>

    <p style="font-family:sans-serif">From WithinWeb.com</p>

  • PHP-KeyCodes

    Setting up Email for use with PHP Applications

    If your application requires emails to be sent out from your web server for such things as sending download information, login information and so on, then you will need to set up some email accounts on your hosting system.

    Log into your hosting account where you set up your databases and administer your web 
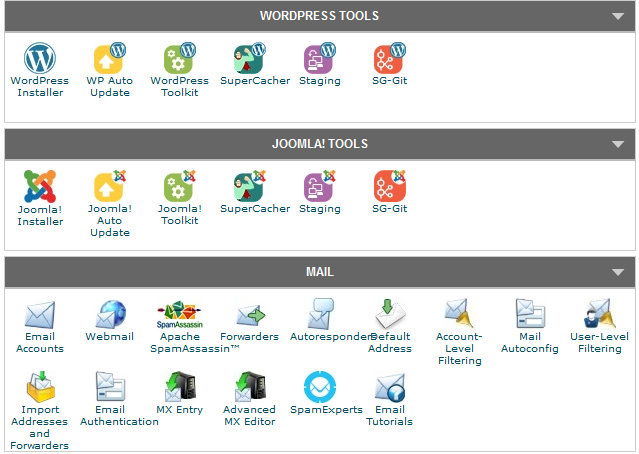
hosting.. Normally this will be using cpanel which will look something like this:

    You should see a section identified as "Mail".

    You need to set up an email account, so click on the link for "Email accounts" which will take you to a display where you create an account with a user name and password for your domain.

    Enter in an email account name. For my applications I normally create an admin account so this will become admin@myservername.com. You also need to enter in a password which you should should keep a record of.

    Now that you have created your account, your hosting will provide you with a link to a web mail client where you can login and then see your emails. You may want to send a test email to your account from hotmail or yahoo just to see how it works.

    Now that you have an email account set up, you can use this in your PHP applications.

    There is one other step that you may want to do, and that is to redirect this email to one of your other accounts. This will mean that when someone emails admin@yourservername.com, it will appear in your hotmail or yahoo account.

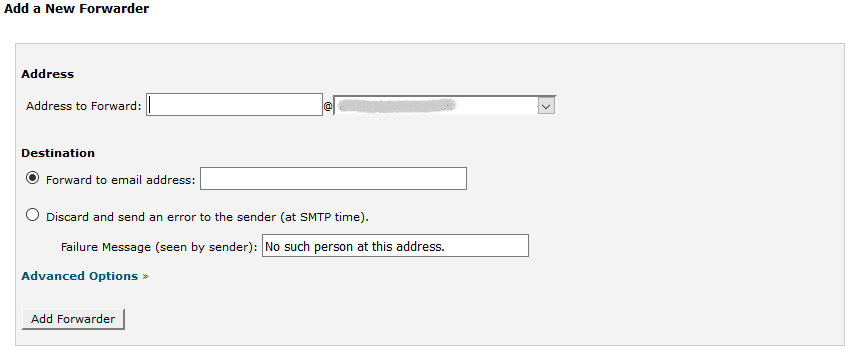
    To do this, in cpanel under the "Mail" section, click on the link called "Forwarders". Click on the button called "Add Forwarders" which will take you a page that will look something like:

    In the "Address to Forward" box enter the address that you just created and in the "Destination" box, enter in your main email account which might be a yahoo or hotmail account. There shouldn't be any need to change any of the options. Then click on the "Add Forwarder" button.

    Now if send an email to the account that you have just created, that email should pop up in the the destination email account.